How to copy, paste and array objects in SketchUp
Copy a component with Move, repeat a spacing with 5x or divide a span with 5/, make a ring with Rotate and paste into groups or other files.
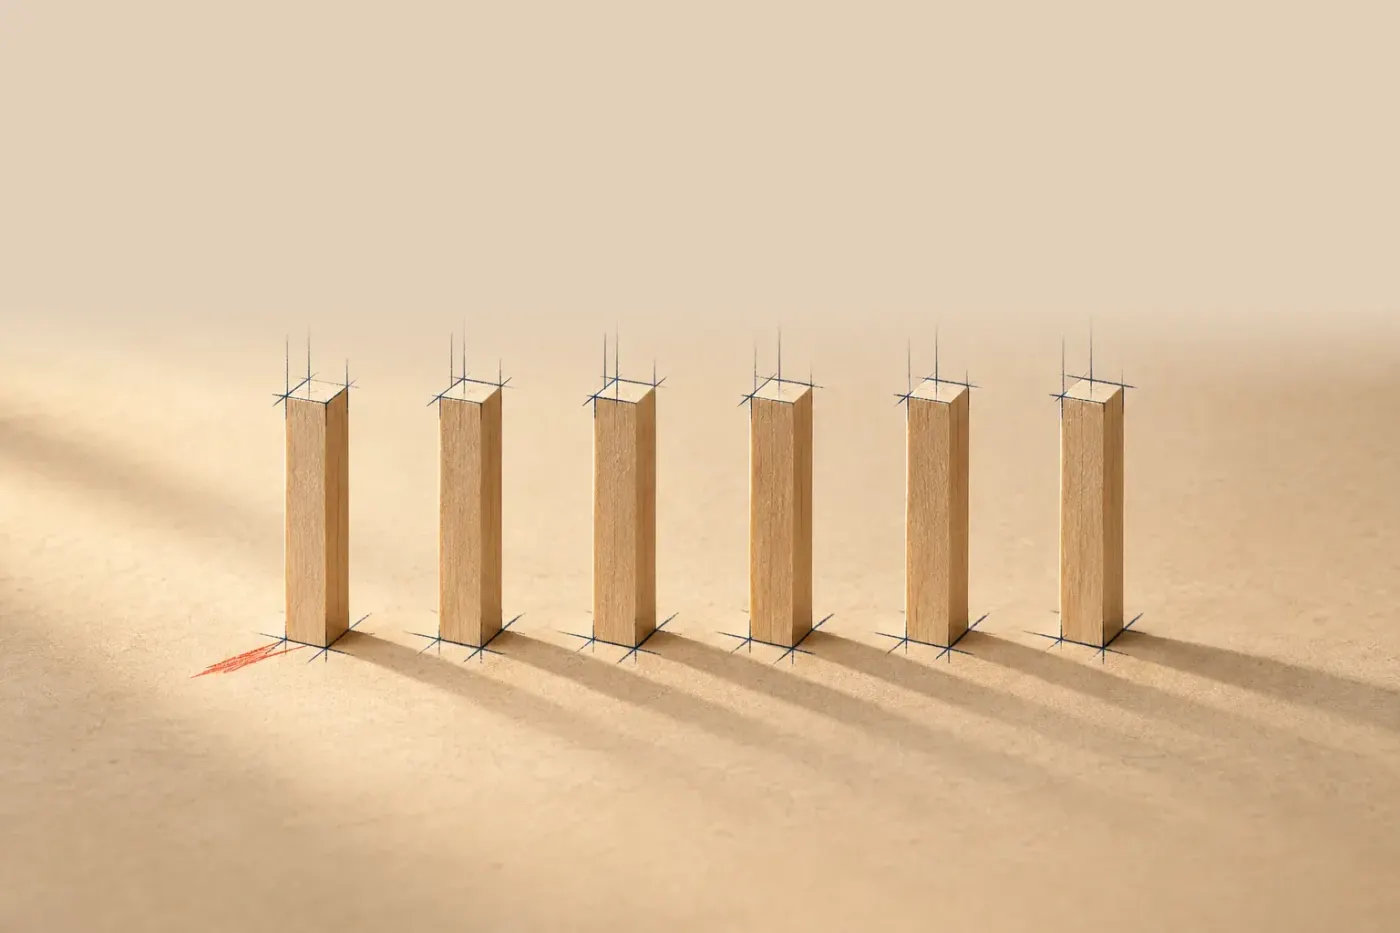
In SketchUp 2027 for Windows or Mac, select the whole object, press M, then tap Ctrl on Windows or Option on Mac to copy it with Move. Place the first copy and immediately type 5x to repeat its spacing, or 5/ to divide the span into five equal intervals. I'd make repeated parts components first because an edit inside one reaches the other instances.
SketchUp for Web copies through its right-click menu, and a row that follows a curve needs the new Copy Along tool; both have their own sections below.
Wrap the part before you copy it
A post needs its faces and edges together. Press Spacebar for Select and click the complete component, rather than a face inside it. For loose geometry, a triple-click selects connected entities; inspect the highlight because connected neighboring geometry joins that selection too.
If the part is already a component, select that instance and go straight to Move. For loose geometry, select only the intended faces and edges, then choose Edit > Make Component. Give the Definition a useful name such as Fence post, leave Replace Selection with Component checked, and click Create. A component separates its geometry from geometry outside it. I'd use one for repeated posts because changing the post's definition then changes the whole run.
A finished shape follows the same rule. If you make a sphere with Follow Me, select the completed sphere as one group or component before copying it. For a row of chairs, you can start with components from 3D Warehouse and select one complete instance.
Place the first Move copy at a typed distance
The copy modifier is Ctrl on Windows or Option on Mac. These keys switch Move into copy mode; Command on Mac is used for clipboard commands below.
- Select the component and press
Mfor Move. Tap the copy modifier for your platform. - Click a recognizable reference point, such as the bottom corner of the post. Move in the direction of the row and wait for the move line to show the intended axis color. Hold
Shiftto lock that inference. - Click to place the first copy, type
600mm, and pressEnter. This is an example spacing between corresponding reference points, not a required fence dimension. - Check that the original remains and a second complete post sits along the intended axis. Continue straight to the array entry below before selecting another tool.
The Move tool accepts an exact distance during or immediately after the move. Including mm makes the example independent of the template's default length unit. If the original moved away, the operation wasn't a copy; return to the two-object stage before multiplying anything. The shortcut keys guide covers changing default tool keys if M has been reassigned.
On iPad, pre-select the component, activate Move and its Copy mode, and use Lock X for a row along the red axis. With a Pencil in Click-Move-Click mode, hard-press the geometry, lift the Pencil, move the copy, and hard-press to place it. Enter a distance in the Measurements box and check that the original remains. For an iPad array, the Move guide uses x3 to create three copies.
Repeat a spacing or divide a span
Choose the entry by the dimension you already know. Use 5x when the first gap is correct. Use 5/ when the original and first copy mark the two ends of the row. SketchUp's Measurements box array entries repeat the initial spacing or distribute copies between those endpoints.
A known spacing: 600mm, then 5x
Immediately after placing the first copy 600mm away, type 5x and press Enter. The five copies include that first copy, giving six posts with the original. In this example their corresponding reference points lie at 0, 600, 1200, 1800, 2400 and 3000 mm from the original.
A known span: 3000mm, then 5/
For a fresh row, copy the original post to the far endpoint at 3000mm. Immediately type 5/ and press Enter. Five equal intervals divide the span into 600mm steps: four posts lie inside the span, with the original and far copy at its ends. There are six posts in total.
Count the original once. The worked copy examples distinguish the number of copies from the total including the original. In either row above, count six containers and five spaces; an extra overlapping copy can hide an incorrect count.

Arrange six positions around a center with Rotate
For a circular array, put the first component away from the intended center. A component sitting on the center won't form a ring when rotated. Choose a center you can locate again and use the same point throughout the operation.
- Select the complete component and choose Rotate with
Q. Hover until the protractor lies in the plane of the ring. HoldShiftto constrain that plane, then click the intended ring center to set the rotation vertex. - Click a reference point on the original component to set the starting direction. Tap
Ctrlon Windows orOptionon Mac to make the rotation a copy. - Move in the intended direction, click to place the rotated copy, then type
60and pressEnterfor the angle. - Immediately type
5xand pressEnter. Count six positions: the original at 0°, then copies at 60°, 120°, 180°, 240° and 300°.
The rotation plane, vertex and starting point determine where the copies travel. The same repeat entry after the first Rotate copy produces the repeated angles in this example. Don't add a copy at 360°: that is the original angular position. Check the center and plane before changing the count if the parts orbit around an unexpected point.
On iPad, activate Rotate and its Copy mode to leave the original in place. With a Pencil in Click-Move-Click mode, long-press and release at the rotation center, long-press at the starting point, then rotate and long-press again to finish. Use the Measurements box for a specific angle or the number of copies. Check the original and each new position before continuing.

Copy along a curve or path in SketchUp 2027
Move arrays only run in a straight line, and Rotate arrays only circle one center. For a curved fence, a row of balusters or a run of posts that turns a corner, SketchUp 2027 adds Copy Along, a procedural tool that duplicates a group or component along a path with adjustable spacing. The path is an edge, arc or curve already in the model, so draw it before you start.
- Click Procedures in the menu, or turn on the Procedural Tools toolbar from View > Toolbars. Copy Along has three placement modes: Entire Path, Each Segment and On Corners. Activate the mode you want.
- Select the component if it isn't selected yet.
- Move the cursor along the edge where the copies should appear, then click. SketchUp sets the copies along that path as one procedural component.
- Select the result and check Entity Info: Placement Mode, Distribution (By Count, By Distance or By Gap, for Entire Path and Each Segment) and Orientation (Stairlike (Yaw Only) or Roadlike (Yaw & Pitch)) stay editable there.
I'd pick By Count when the number of posts is fixed, since the copies then spread evenly along whatever length the path has; By Distance places a copy at each interval even where copies overlap. Double-click the procedural component to edit the original part or adjust the path. The context menu's Explode to Inputs removes the procedural component and keeps the geometry.
Copy Along is a 2027 desktop tool. The release notes don't list it for Web or iPad, and earlier desktop versions don't have it, so the Move and Rotate arrays above remain the route there. Follow Me sits in the same Procedures group in 2027; the Follow Me guide covers sweeping a profile along a path.
Copy and paste into a group or another open model
Use the clipboard when the destination is a different editing context or file. Select the whole component and use Ctrl+C on Windows or Command+C on Mac. Switch to the destination, then use Ctrl+V or Command+V and click to place it.
Paste In Place is useful when you want the corresponding placement preserved. Copy the selected part, leave the source editing context, and enter the destination group before choosing Edit > Paste In Place. The Desktop Copy followed by Paste In Place workflow retains the source, so use it for duplication.
For a second file, keep both models open in the same Desktop session. In SketchUp 2027, a file opened from the File menu lands in a new model tab in the same window. Copy from the source, click the target model's tab, and choose Edit > Paste In Place. The same-session placement example applies to a straightforward transfer; compare the pasted part with a known reference before continuing, particularly when the models have different origins or transformed containers.
To relocate geometry into a group, use Cut instead of Copy. Cut removes the source selection. SketchUp's nested-level instructions select the geometry inside its source group, use Edit > Cut, enter the destination level, then use Edit > Paste In Place.
Check the destination before pasting into a component. Adding geometry inside it changes the component definition and its other instances. Moving or rotating one whole instance changes that instance's placement independently.

Copy in SketchUp for Web
In SketchUp for Web, select a complete group or component, right-click it and choose Copy, then right-click empty space, choose Paste and click to place it. Check that the original still stands and the copy sits where you clicked.
The Web Main Toolbar carries Move (M) and Rotate (Q), but the Web Help doesn't document a copy modifier or the 5x and 5/ entries for the browser. Search finds a tool or command by name, and the Instructor panel on the right shows hints for the active tool.
Save a view of the finished row
Frame the row so all six posts and its five intervals are visible. In the Scenes panel, click Add Scenes, open Show Details, and name the scene Array check. Keep Camera Location saved so the scene tab returns to this view. Continue with the part's next operation from the modeling guides.